Skip to content
origamidiagrams

Outside reverse fold

An outside reverse fold is a move where the layers of a point are wrapped around the outside of the model, reversing the crease in the opposite way to an inside reverse fold.

Pre-crease the fold line, open the layers of the point, and fold them around the outside so they enclose the rest of the point. Flatten the model. It is common for heads and tails that should show the color of the other side.

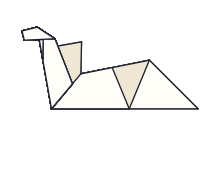
Because the layers wrap outward, it is easy to tear the paper at the crease. Open the layers gradually and fold both sides evenly. The Swan on this site uses two: one at the base of the neck and a smaller one that turns the head forward. It is also part of many traditional animals.

How to fold a outside reverse fold, step by step

  1. 1

    Fold the point along the line where it should bend, crease firmly through all the layers and unfold.

  2. 2

    Fold it the other way along the same line and unfold again.

  3. 3

    Separate the layers of the point slightly, starting from the open edge.

  4. 4

    Swing the point back over itself so its layers wrap around the outside of the model along the crease.

  5. 5

    Bring the layers together on both sides and flatten.

  6. 6

    Check that both sides of the fold match before pressing firmly.
Advertisement

Common mistakes and how to fix them

  • The paper tears at the bend

    The outer layers stretch more than in an inside reverse fold. Pre-crease well, open the layers gradually and fold both sides together.

  • The point wraps on one side only

    Both layers must turn at the same time. Open the point a little wider so each one can follow the crease.

  • The new angle is too shallow or too steep

    The angle comes from the pre-crease. Unfold, re-crease at the angle the diagram shows and try again.

When you’ll use it

An outside reverse fold changes the color of the part you fold, because the inside of the paper is wrapped to the outside. That makes it useful for heads, tails, beaks and crests that should contrast with the body, and for points that are too thick to push inside. It is a little harder than an inside reverse fold, because the layers must open wider and stay visible the whole time. A simple way to practice is to fold a long, narrow kite in half and make one outside reverse fold on the long point, then make an inside reverse fold on a second kite and compare the two. The Swan is the easiest model on this site that uses it.

Practice it on these models

Outside reverse fold: questions

When should I use an outside reverse fold instead of an inside one?+

When the folded part should show the color of the other side, or when the point is too thick to tuck inside. Heads and tails of animals are typical, like the neck and head of the Swan.

How is an outside reverse fold drawn in diagrams?+

With the fold line marked across the point and a curved arrow showing the paper wrapping back around the outside. The next picture shows the layers enclosing the rest of the point.