How to Fold a Christmas Tree Napkin
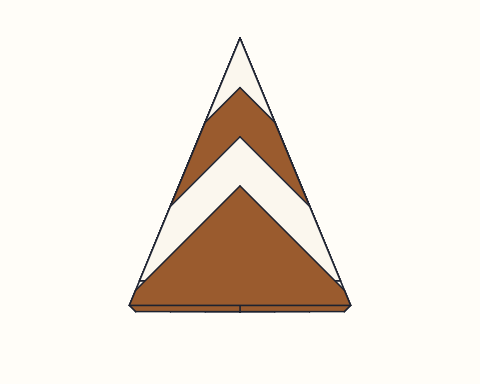
The Christmas tree napkin is a flat, festive fold: a tall tree with four stacked tiers that lies on the plate. It is made from a square napkin folded in quarters, with each layer folded up a little short of the one before and the sides folded in to shape the tree. It takes about five minutes and looks best in green or red cloth napkins.
Quick answerThe origami christmas tree napkin is an intermediate model folded in 8 steps and about 5 minutes, using only valley folds. You need a square cloth napkin, 40–50 cm (16–20 in); green is classic. Large paper napkins work too.
- Difficulty
- Intermediate
- Time
- About 5 min
- Steps
- 8
- Paper
- A square cloth napkin, 40–50 cm (16–20 in); green is classic. Large paper napkins work too
Printable Christmas tree napkin diagram (PDF)
All 8 steps with pictures on 3 pages, ready to print in color or black and white. Free, no sign-up.
Lay the napkin flat with the wrong side up. Fold it in half from left to right.
Tip: swipe the diagram, or use ← → on your keyboard. Space plays and pauses.
All steps
Step-by-step instructions
The same 8 steps as the animation above, written out so you can fold away from the screen.
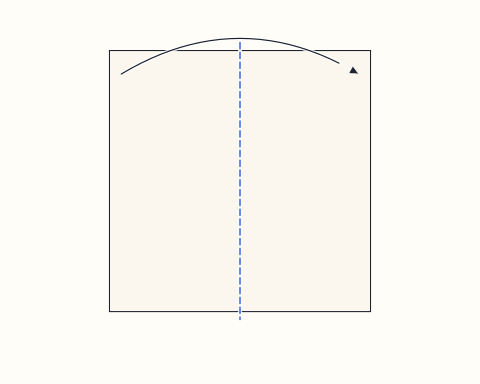
Step 1
Lay the napkin flat with the wrong side up. Fold it in half from left to right.
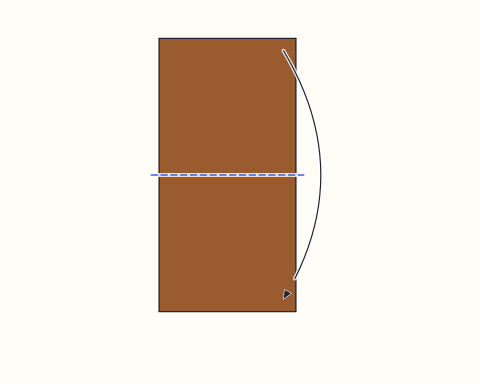
Step 2
Fold it in half again from top to bottom, making a smaller square. The four loose corners are now together at the bottom right.
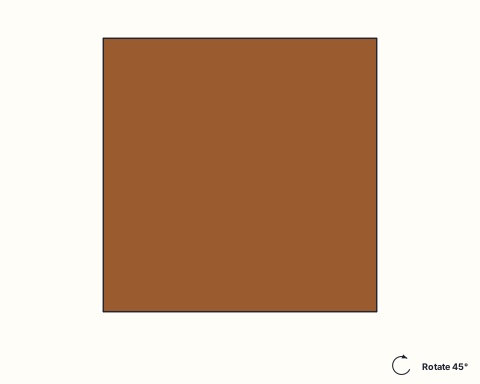
Step 3
Turn the square a quarter turn so the loose corners point straight towards you, like a diamond.
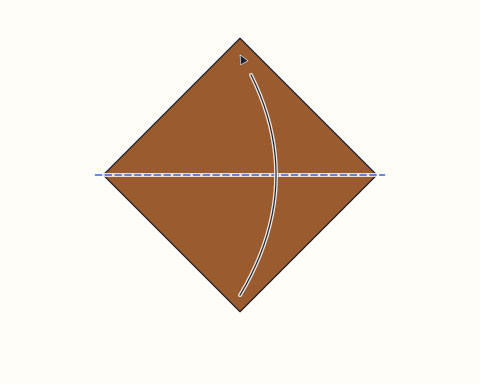
Step 4
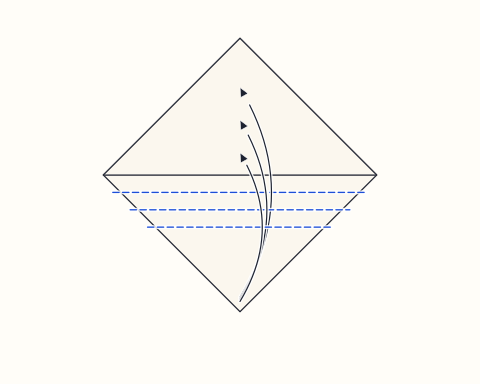
Take only the top layer and fold its bottom corner up to the top corner.
Step 5
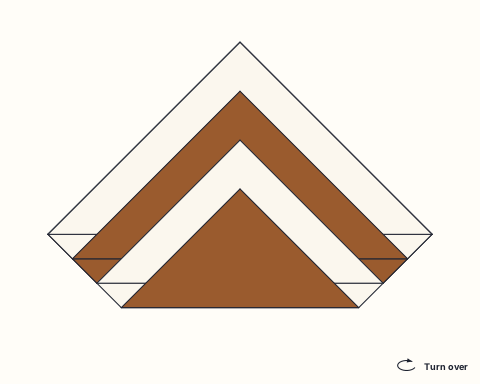
Fold the next layer up the same way, but stop about 4 cm (1 1/2 in) below the point of the first. Fold the last two layers up too, each about 4 cm lower than the one before, so the four points stack like steps.
Step 6
Turn the napkin over, keeping the point at the top.
Step 7
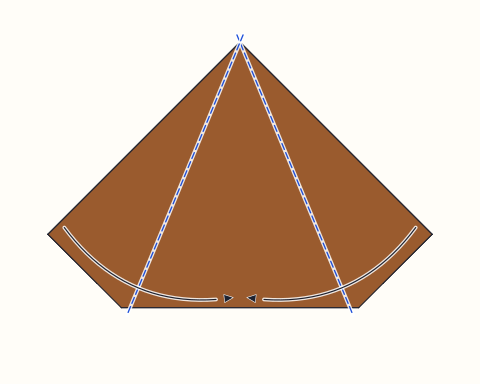
Fold the left and right sides in along slanted lines from the top point, so the two top edges meet on the centre line. The napkin is now a tall triangle.
Step 8
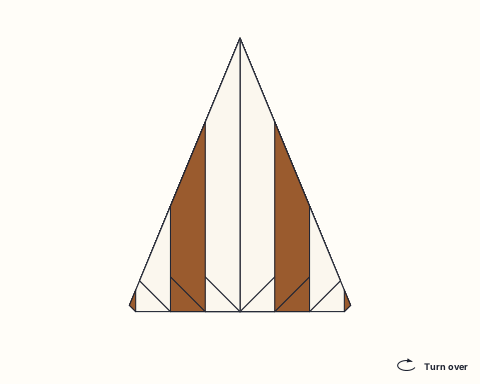
Turn the napkin over again. The stacked layers show on the front as the tiers of the tree.
Finished
Your Christmas tree napkin is finished: a tall tree with four stacked tiers. Lay it on the plate with the point towards the centre of the table and top it with a star-shaped cookie, a place card or a small ornament.
About the origami christmas tree napkin
The Christmas tree is the best-known festive napkin fold. It uses the four layers of a napkin folded in quarters as the four tiers of the tree: with the loose corners pointing towards you, each layer is folded up a little short of the one before, so the points stack like steps. Turning the napkin over and folding the sides in narrows the stack into a tall triangle, and on the front the stacked edges read as the tiers of a fir tree.
It is a little more involved than a pyramid or a pocket because you work with separate layers, but every move is still a simple flat fold. The only skill is keeping the stacked layers even and flat as you go.
Set one on each plate for Christmas dinner, a holiday party or an Advent brunch. It lies flat, so it fits under a place card or a small gift, and it pairs naturally with folded paper decorations such as an origami Christmas tree or lucky stars scattered on the table.
Seasonal · Thanksgiving
Fold it for Thanksgiving
The christmas tree napkin works on the Thanksgiving table too. See napkin folds, place cards and gratitude crafts on the Thanksgiving page.
Origami christmas tree napkin: questions
What napkin is best for the Christmas tree fold?+
A square cloth napkin of 40–50 cm (16–20 in) in a thin, smooth fabric. Green looks like a fir tree; red, white or gold work well too. The fold has up to eight layers in places, so very thick napkins become bulky.
Can I fold a Christmas tree napkin with paper napkins?+
Yes, with large dinner-size paper napkins opened to their full square. Fold carefully, because paper tears more easily at the many layered corners, and press each fold flat on the table.
Why do my tiers come out uneven?+
The layers in step 5 were folded at uneven heights or slid while you folded the sides. Fold each layer the same distance below the one before and hold the stack flat while you make the side folds.
How do I decorate a napkin tree?+
Lay a star-shaped cookie or a gold paper star at the top, a mini candy cane or a sprig of rosemary at the bottom as the trunk, or slip a name card under the lowest tier.
Can I fold the napkins the day before?+
Yes. Fold them completely, stack them flat with a sheet of paper between each one, and put a book on top so the tiers stay pressed.
Fold this next
Christmas Tree
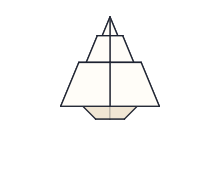
The origami Christmas tree is a flat fir tree with three stepped tiers and a small trunk, folded from one square without cutting. It is an easy model that takes about five minutes; the only new idea is a simple pleat that creates each tier.
Pyramid napkin
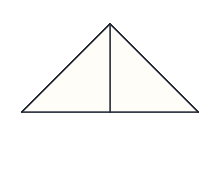
The pyramid is the classic standing napkin fold: a neat four-sided pyramid that sits on the plate and makes any table look set by a restaurant. It takes four folds and about two minutes, works with cloth or paper napkins, and is the easiest standing fold to learn first.
Silverware pocket napkin
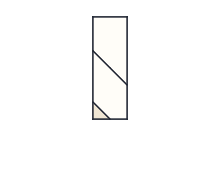
The silverware pocket is a slim napkin fold with a diagonal band across the front that holds a knife, fork and spoon. It is folded flat in seven quick steps from a square napkin, takes about three minutes, and is the most practical fold for buffets, picnics and holiday dinners where guests carry their own place setting.

Lucky Star
An origami lucky star is a tiny, puffy five-pointed star made by knotting a long paper strip into a pentagon and wrapping it. It is easy and takes about three minutes, though the final puffing step needs a light touch.