How to Fold an Origami Envelope
The origami envelope is a small rectangular letter envelope folded from a single square that locks shut by tucking the top flap under the bottom one, so it needs no glue or tape. It is an easy model with four folds and takes about three minutes.
Quick answerThe origami envelope is an easy model folded in 4 steps and about 3 minutes, using the crease. You need a square of 20 cm (8 in) or larger; a 21 cm square cut from A4 gives an envelope about 18.5 × 11 cm.
- Difficulty
- Easy
- Time
- About 3 min
- Steps
- 4
- Paper
- A square of 20 cm (8 in) or larger; a 21 cm square cut from A4 gives an envelope about 18.5 × 11 cm
Place the square as a diamond with the white side facing you. Fold the bottom corner up to meet the top corner, then open it again to leave a crease across the middle.
Tip: swipe the diagram, or use ← → on your keyboard. Space plays and pauses.
All steps
Advertisement
Step-by-step instructions
The same 4 steps as the animation above, written out so you can fold away from the screen.
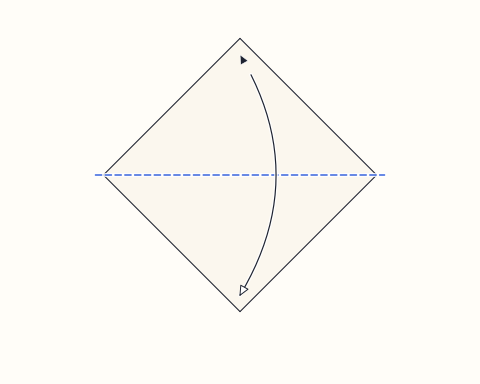
Step 1
Place the square as a diamond with the white side facing you. Fold the bottom corner up to meet the top corner, then open it again to leave a crease across the middle.
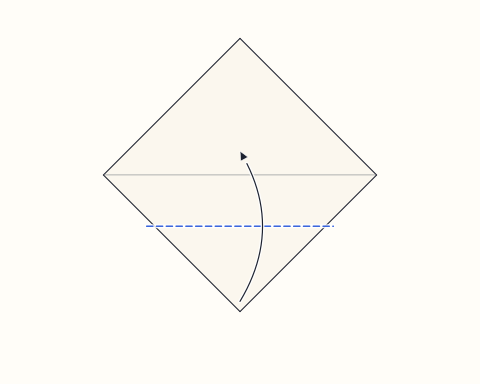
Step 2
Fold the bottom corner up so it goes past that centre crease and its point rests about a quarter of the way from the centre to the top corner.
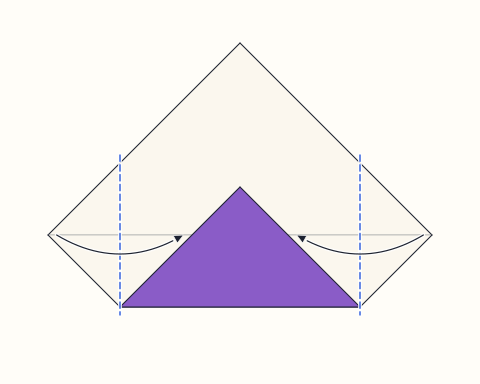
Step 3
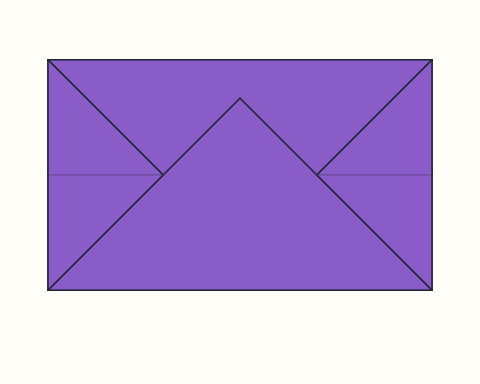
Fold the left corner and then the right corner in along vertical lines. Each line starts where the edge of the bottom flap meets the outer edge of the paper, so the sides of the envelope come out straight.
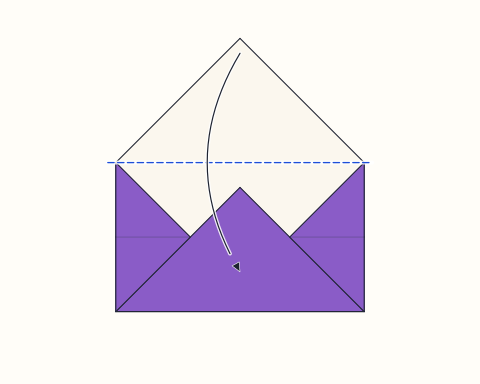
Step 4
Fold the top corner down along the line joining the tops of the two side folds, and slip its point under the edges of the bottom flap so the envelope stays closed.
Finished
The envelope is finished and holds itself shut. To send a note, lift the top flap out, slide a folded letter or a small card into the pocket, and tuck the flap back under the bottom flap. Add a sticker over the point if it will travel in a bag or in the post.
About the origami envelope
Folding letters and envelopes from a single sheet is an old habit that predates the ready-made gummed envelope, and many simple folded envelopes are shared as traditional designs without a known author. This version follows the same basic idea used by countless crafters: the bottom, the two sides and the top of a diamond are folded towards the middle, and the last flap is tucked in to lock everything. Because the fold lines are found from the paper itself, each step has a clear landmark, so the envelope comes out straight without measuring.
An envelope like this turns any note into a small gift. It is ideal for thank-you notes, party invitations, pocket money, seed packets, recipe cards or a love letter, and folding it from wrapping paper, maps or old magazine pages gives it a handmade look that a shop envelope cannot match. Children enjoy making their own post office with a stack of them, and the tuck lock teaches the idea that paper can hold itself together through friction alone, a principle behind many traditional containers.
To make a matching set, fold an Origami Heart to put inside, or pair the envelope with a Corner Bookmark as a small reading gift. If you want a container with walls instead of a flat pocket, the Masu Box is the next step, and a handful of Lucky Stars tucked inside makes a cheerful surprise.
Origami envelope: questions
Can you make an envelope without glue?+
Yes. In this design the point of the top flap slides under the raw edges of the bottom flap, and the friction between the layers keeps the envelope closed. It is secure enough for hand delivery; for posting, adding a sticker over the point is sensible.
What size square do I need for my letter?+
The envelope comes out about 0.88 times the width of the square and about 0.53 times its height. A 15 cm (6 in) square makes a mini envelope of roughly 13 × 8 cm for gift tags and notes, while a 21 cm square cut from A4 fits a card of up to about 17 × 10 cm.
Can I mail an origami envelope?+
Postal rules vary by country, but in general a handmade envelope needs to be sturdy, sealed and within the standard size limits, with a clear address and stamp. Use thicker paper, seal the flap with a sticker or tape, and check your local postal service's rules for size and shape.
How do I make an envelope from A4 or Letter paper?+
First make a square: fold one short edge diagonally down to a long edge, cut or tear off the leftover strip, and unfold. A4 gives a 21 cm square and US Letter a 21.6 cm (8.5 in) square, both good sizes for this envelope.
Fold this next
Origami Heart
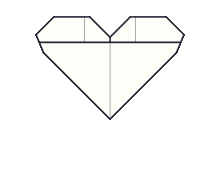
The origami heart is a flat, symmetrical heart shape folded from one square, ideal for slipping into a card or envelope. It is an easy model that takes around five minutes and uses only simple valley and mountain folds.
Corner Bookmark
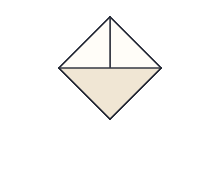
The origami corner bookmark is a small square with a triangular pocket that slides over the corner of a page to mark your place. It is an easy model folded from one square in four steps and takes about three minutes, which makes it a favourite classroom craft.
Masu Box
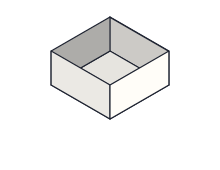
The masu box is a traditional Japanese square box folded from a single sheet that locks together without glue. It is an intermediate model that takes about eight minutes, with one three-dimensional step where the walls are raised.

Lucky Star
An origami lucky star is a tiny, puffy five-pointed star made by knotting a long paper strip into a pentagon and wrapping it. It is easy and takes about three minutes, though the final puffing step needs a light touch.