How to Fold an Origami Masu Box
The masu box is a traditional Japanese square box folded from a single sheet that locks together without glue. It is an intermediate model that takes about eight minutes, with one three-dimensional step where the walls are raised.
- Difficulty
- Intermediate
- Time
- About 8 min
- Steps
- 9
- Paper
- A square between 15 and 25 cm (6–10 in); heavier paper gives firmer walls
Lay the square white side up, turned so a corner points at you. Crease both diagonals by folding corner to corner and opening.
Tip: swipe the diagram, or use ← → on your keyboard. Space plays and pauses.
All steps
Advertisement
Step-by-step instructions
The same 9 steps as the animation above, written out so you can fold away from the screen.
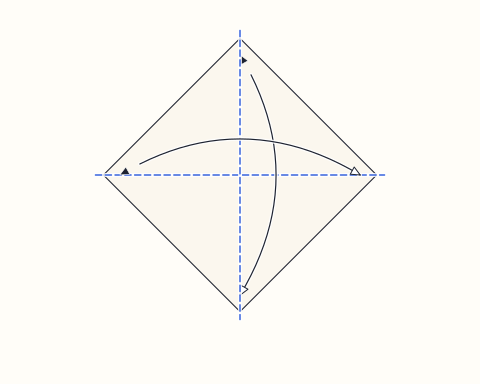
Step 1
Lay the square white side up, turned so a corner points at you. Crease both diagonals by folding corner to corner and opening.
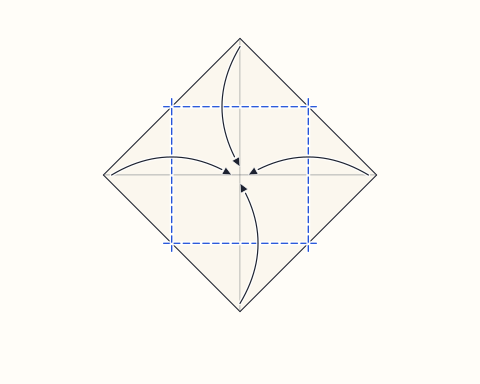
Step 2
Bring all four corners to the center point; this is called a blintz fold.
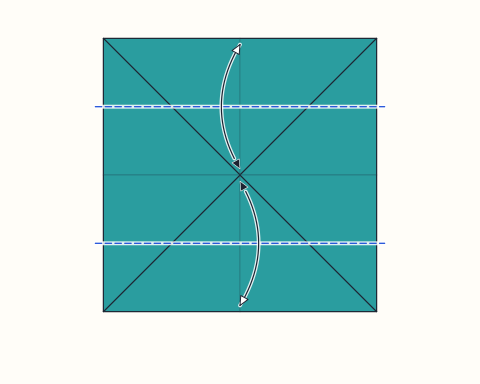
Step 3
Bring the upper and lower edges to the middle line, crease firmly, and open them again.
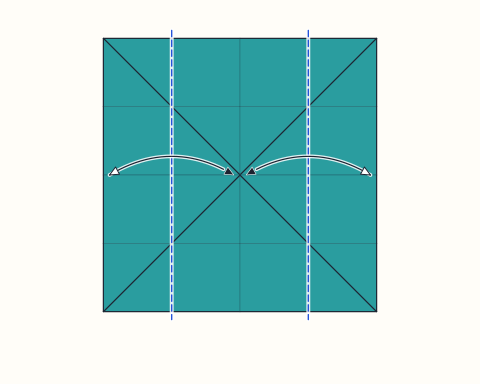
Step 4
Repeat with the left and right edges: fold them to the center line, crease, and open.
Advertisement
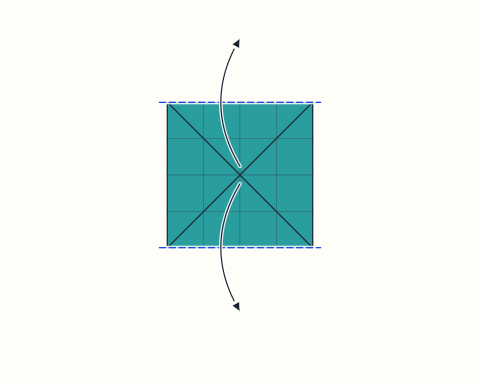
Step 5
Open out the top and bottom triangles.
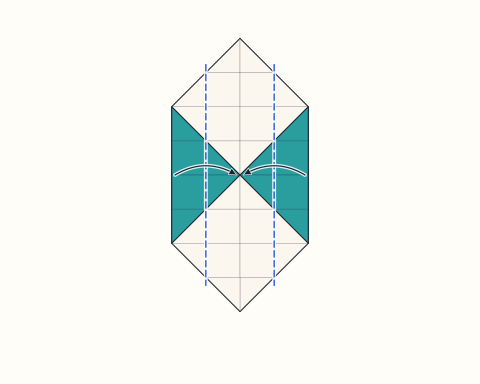
Step 6
Using the creases already there, fold the left and right sides to the middle.
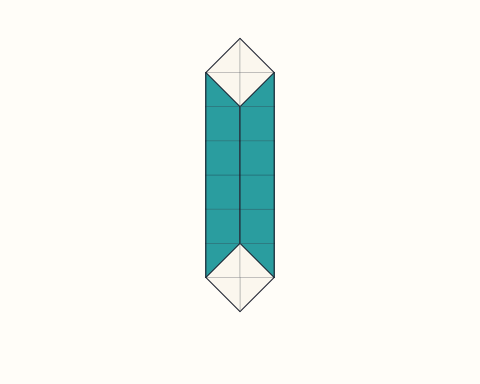
Step 7
Lift those two folded sides until they stand upright; they are the first two walls.
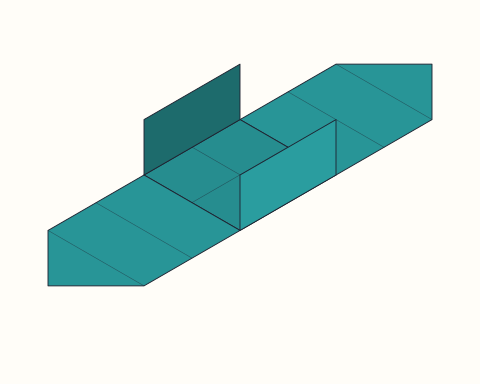
Step 8
Raise one open end. As it lifts, press its corners inward along the creases so it forms a third wall, then wrap its point over the top of that wall and down inside.
Step 9
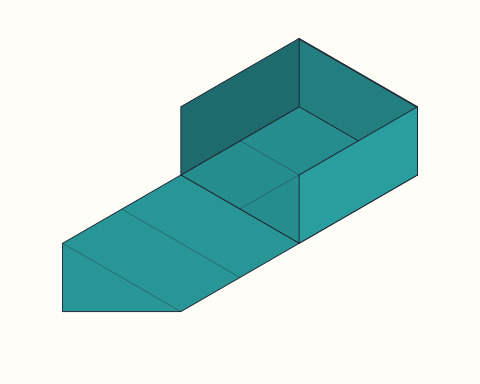
Do the same at the opposite end and press the point flat against the floor of the box.
Finished
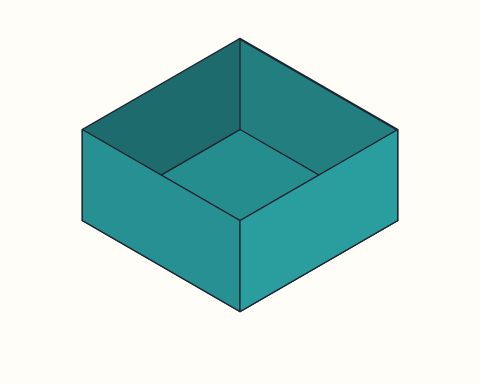
Pinch along each wall to give it a crisp edge. To make a lid, fold another box from a square about 1 cm (1/2 in) larger; it slips neatly over the first.
About the origami masu box
The masu box takes its name from the square wooden measuring boxes that were used in Japan for rice and are still used to serve sake. The paper version is a traditional model and one of the most useful things you can fold: a neat, strong box that stays together without adhesive. Folded from decorative paper, it becomes a gift box for jewelry or sweets; folded from a newspaper page, it can hold paper clips and odds and ends on a desk. Many folders keep a stack of them for sorting beads, buttons and other small craft supplies.
Its sequence is a lesson in preparation. Most of the steps are creases that you make and then undo, building a grid that later tells the paper exactly where to go. The blintz fold appears at the start, and raising the walls is a gentle introduction to three-dimensional forming, where the paper stops lying flat and starts to enclose space. If your creases are precise, the box practically assembles itself; if they are not, you will see it in wavy walls or a floor that does not sit flat. That direct feedback makes the masu an excellent teacher.
A pair of boxes, one slightly larger to serve as a lid, makes a lovely container for Lucky Stars, a folded Heart or a small treat. For dividers, fold a smaller masu and set it inside a larger one. The Paper Cup is a quicker container for when you need something in seconds, while the Pinwheel reuses the same center-line grid in a completely different way. If you enjoy the precision the masu demands, you are well prepared for the Paper Crane, which relies on the same exact edge-to-center folding throughout.
Origami masu box: questions
What is a masu box used for?+
A masu is a traditional Japanese wooden box once used to measure rice, and square masu cups are still used to serve sake at celebrations. The paper version is popular as a small gift box, desk tidy, or container for sweets, jewelry and paper stars.
How do I make a lid for the masu box?+
Fold a second box from a square about 1 cm (1/2 in) larger than the first. For a 15 cm box, a 16 cm square works well. The slightly bigger box slides over the smaller one as a lid.
How big will my box be?+
The finished box is roughly a third of the paper’s width across. A 15 cm square gives a box about 5 cm wide, and a 25 cm square gives one around 9 cm wide.
Can I fold a masu box from printer paper?+
Yes, once you cut it into a square. Printer paper makes a sturdy box, but it can be stiff at the corners during the wall-raising step, so crease carefully. For decorative boxes, gift wrap or patterned origami paper looks better.
Why does my masu box come apart?+
Usually the points folded into the box are not pressed flat under the walls. Make sure each point lies all the way down on the floor and that the side walls were fully creased at the center before assembly.
Fold this next
Paper Cup
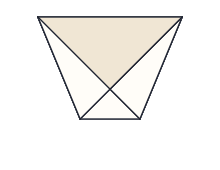
The origami paper cup is a small open container folded from a single square that can briefly hold water or dry snacks. It is one of the easiest origami models and takes about two minutes, making it a classic first project.

Lucky Star
An origami lucky star is a tiny, puffy five-pointed star made by knotting a long paper strip into a pentagon and wrapping it. It is easy and takes about three minutes, though the final puffing step needs a light touch.
Pinwheel
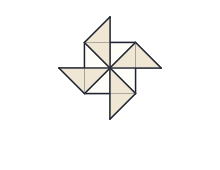
The origami pinwheel is a flat four-bladed model folded from the traditional windmill base that can be pinned to a stick so it spins in the wind. It is an intermediate model taking about six minutes, with one careful step where hidden corners are pulled out.
Paper Crane
The origami crane is the traditional Japanese orizuru, a bird with spread wings folded from a single square without cuts or glue. It is an advanced model: expect about 15 minutes for your first one, mostly spent learning the petal fold and inside reverse fold.