How to Fold an Origami Butterfly
The origami butterfly is a small model with four wings and a locked body, folded from a square using the waterbomb base. It is a comfortable intermediate model that takes about six minutes and introduces collapsing a base.
- Difficulty
- Intermediate
- Time
- About 6 min
- Steps
- 9
- Paper
- A 15 cm (6 in) square; bold patterned paper makes the wings stand out
Begin white side up and crease both diagonals, folding corner to corner and opening each time.
Tip: swipe the diagram, or use ← → on your keyboard. Space plays and pauses.
All steps
Advertisement
Step-by-step instructions
The same 9 steps as the animation above, written out so you can fold away from the screen.
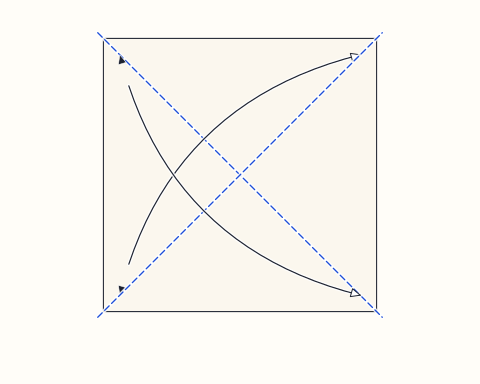
Step 1
Begin white side up and crease both diagonals, folding corner to corner and opening each time.
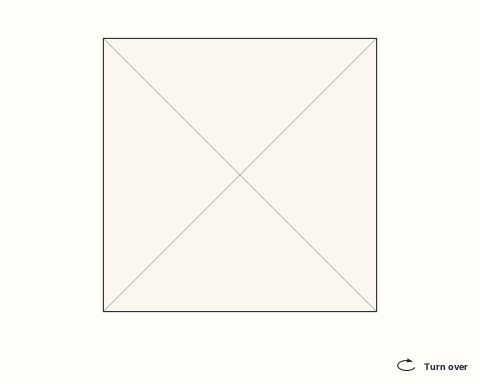
Step 2
Flip the paper over.
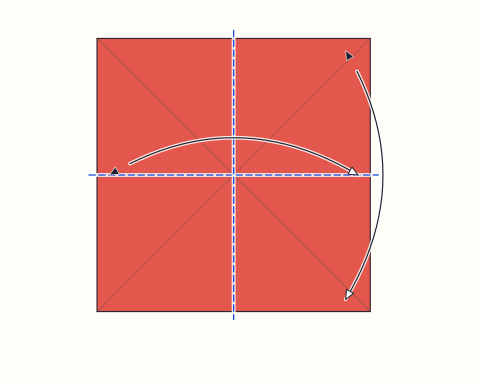
Step 3
Crease both midlines by folding edge to edge, then open.
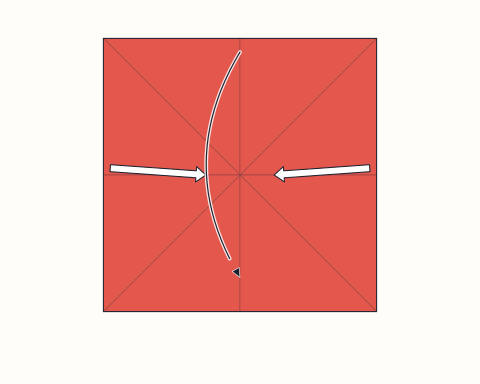
Step 4
Push the side edges inward along the creases as the upper half comes down, and the paper collapses into a triangle with its tip at the top. You have made a waterbomb base.
Advertisement
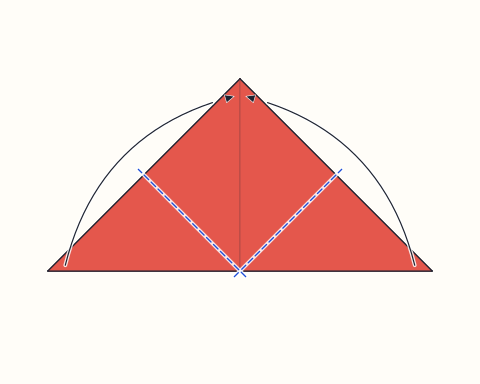
Step 5
Take the two bottom corners of the upper layer up to the apex; the result is a diamond.
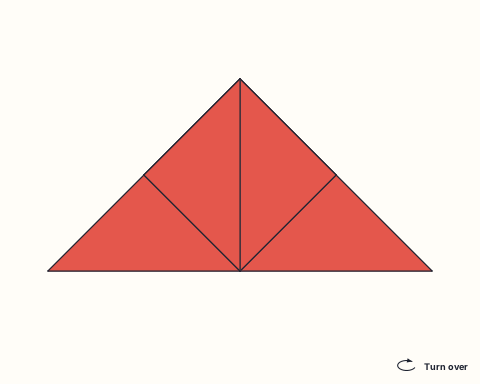
Step 6
Flip the model over.
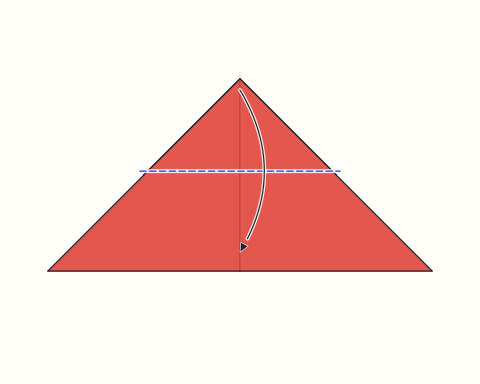
Step 7
Fold the top point downward until its tip almost touches the bottom edge. Leave the diamond’s points behind in place, since they become the upper wings.
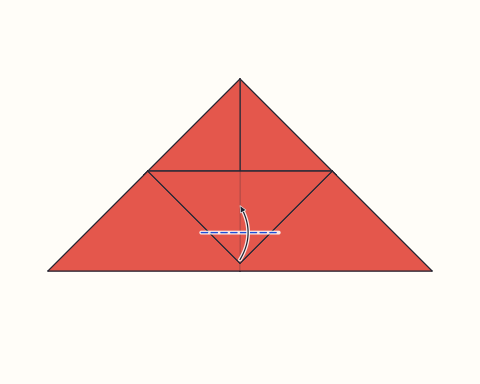
Step 8
Fold the tip back upward over the new folded edge. This small triangle forms the body and holds the layers together.
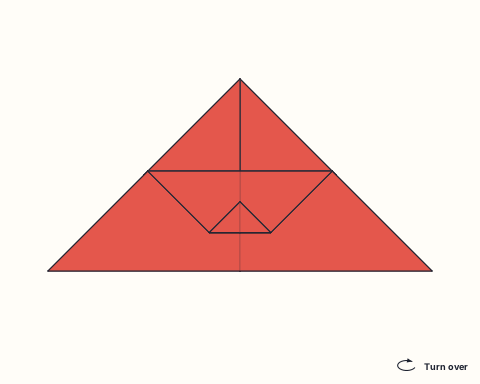
Step 9
Flip the model over.
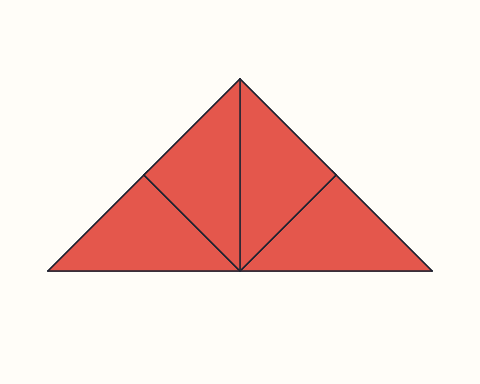
Finished
Valley fold the whole model along its vertical center, wings together at the back, and then let it spring about halfway open. The wings rise, the body stands proud, and a firm pinch on either side of the body keeps it that way.
About the origami butterfly
This butterfly is a quick, charming model with two pairs of wings and a small triangular body that locks everything in place. It is popular for decorating walls, gift boxes, cards and party tables, and it looks particularly striking when folded from patterned or two-tone paper. Because it stays flat until the final shaping, it is easy to fold in batches and store for a display. Clusters of butterflies in graded sizes, fixed to a wall so they appear to fly in one direction, are a favorite bedroom and classroom decoration.
The key lesson here is the waterbomb base, which you collapse from a square creased along its diagonals on one side and along its midlines on the other. Watching the paper fold itself into a triangle along those lines is a small revelation for many beginners, and it shows why careful pre-creasing matters so much. The body lock at the end is an elegant way to hold several layers together without glue, and the final valley and mountain shaping shows how a flat model can gain depth with just one or two soft creases.
After the butterfly, the Jumping Frog uses a similar collapse at the top of an index card, turning it into front legs instead of wings. The Paper Crane is the natural next challenge, as it starts from the preliminary base, the waterbomb base’s close relative, and adds petal folds. For a garden theme, display your butterflies with the Tulip and Tulip Stem, or glue one beside a folded Heart on a card. Experimenting with where the top point lands in step 7 also changes the wing shape, so try a few versions.
Origami butterfly: questions
What is the waterbomb base used for in this butterfly?+
The waterbomb base gives you a triangle with hidden layers that become the four wings. It is a standard origami starting shape, and learning it here prepares you for many other traditional models.
Is the origami butterfly suitable for children?+
Children around eight and older can usually fold it with a little help on the collapse in step 4. Younger children enjoy decorating butterflies that an adult has folded.
Why won’t my butterfly’s body lock?+
The top point probably reaches too far past the bottom edge or not far enough. It should almost touch the bottom. Then fold the tip back up over the edge and crease firmly.
How can I use paper butterflies as decorations?+
Attach them to walls with removable adhesive, tie them to thread for a mobile, or glue them onto cards. Mixing sizes and patterns makes a lively display.
Fold this next
Jumping Frog
The origami jumping frog is a traditional action model folded from a stiff rectangle that springs forward when you press and release its back. It is an intermediate model that takes about six minutes, mostly for the collapse and the zigzag spring.
Paper Crane
The origami crane is the traditional Japanese orizuru, a bird with spread wings folded from a single square without cuts or glue. It is an advanced model: expect about 15 minutes for your first one, mostly spent learning the petal fold and inside reverse fold.
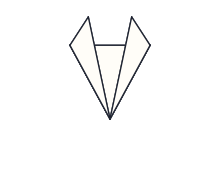
Tulip
The origami tulip is a flat flower head made from a single square in three folds, designed to be joined to a separate folded stem. It is one of the easiest models on the site and takes about three minutes.
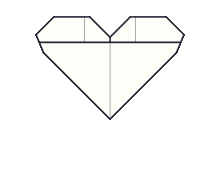
Origami Heart
The origami heart is a flat, symmetrical heart shape folded from one square, ideal for slipping into a card or envelope. It is an easy model that takes around five minutes and uses only simple valley and mountain folds.