Skip to content
origamidiagrams

Mountain fold

A mountain fold is a fold where the paper bends away from you, so the crease rises toward you like a ridge.

It is simply a valley fold made from the other side. You can fold the flap behind the model, or turn the paper over, make a valley fold, and turn it back. Diagrams show it as a dash-dot line, often with a hollow arrowhead pointing behind the paper.

Beginners often fold the flap toward themselves by habit, which gives a valley instead. Before creasing, check that the flap is disappearing behind the model. For small corner folds at the back, turning the paper over is usually more accurate.

How to fold a mountain fold, step by step

  1. 1

    Find the dash-dot line on the diagram: that is where the ridge of the fold will be.

  2. 2

    Decide how to fold it. A large flap can go straight back behind the model; for a small corner it is usually easier to turn the paper over first.

  3. 3

    Folding behind: hold the model with one hand, push the flap back along the line with the other, and feel for the edges you need to match.

  4. 4

    Folding from the other side: turn the paper over, make a valley fold along the same line, then turn it back.

  5. 5

    Press the fold flat from the middle outward and sharpen it with a fingernail.

  6. 6

    Check the front: you should see a crisp ridge rising toward you along the marked line.
Advertisement

Common mistakes and how to fix them

  • You folded toward yourself out of habit

    If the flap now sits in front of the model, you made a valley fold. Unfold it and send the flap behind instead.

  • The layers at the back don’t line up

    When you can’t see both edges, turn the model over and make the fold as a valley fold. The result is identical, and you can align it by eye.

  • The ridge wanders off the line

    Pinch the two ends of the fold line first, then press the crease between the pinches.

When you’ll use it

Mountain folds appear whenever part of the model has to go behind: tucking a corner away, rounding the back of a head, or folding a whole model in half so the color stays outside. The Swan is folded in half with one, and the Dog Face uses them to send its bottom layer and the top of its head behind. They are also half of every pleat and crimp, which pair one valley fold with one mountain fold. In printed diagrams you often see both on the same sheet of creases: that pattern of mountains and valleys is what lets a base collapse in one smooth move instead of fighting you.

Practice it on these models

Mountain fold: questions

How is a mountain fold shown in a diagram?+

As a line of alternating dashes and dots, often with a hollow or half arrowhead pointing behind the paper to show that the flap goes back, away from you.

Do easy models use mountain folds?+

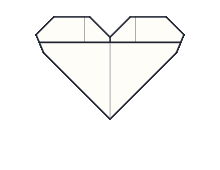
Often just one or two, usually to tuck a corner behind, as in the Dog Face or the Origami Heart. If folding behind feels awkward, turn the paper over and make a valley fold instead.