How to Fold an Origami Ghost
The origami ghost is a flat Halloween ghost with a round, domed head and a wavy hem of three points, folded from one square with the white side showing. It is an easy model with five steps and takes about three minutes; you draw the eyes and mouth on at the end.
Quick answerThe origami ghost is an easy model folded in 5 steps and about 3 minutes, using the crease. You need a 15 cm (6 in) square, white on at least one side; plain white printer paper cut square works well.
- Difficulty
- Easy
- Time
- About 3 min
- Steps
- 5
- Paper
- A 15 cm (6 in) square, white on at least one side; plain white printer paper cut square works well
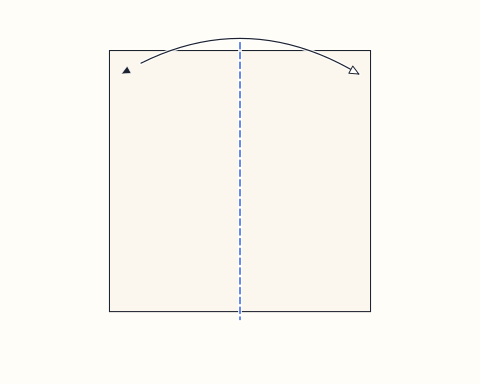
Lay the square with the white side facing up, fold it in half from left to right, and open it again so a vertical crease marks the middle.
Tip: swipe the diagram, or use ← → on your keyboard. Space plays and pauses.
All steps
Advertisement
Step-by-step instructions
The same 5 steps as the animation above, written out so you can fold away from the screen.
Step 1
Lay the square with the white side facing up, fold it in half from left to right, and open it again so a vertical crease marks the middle.
Step 2
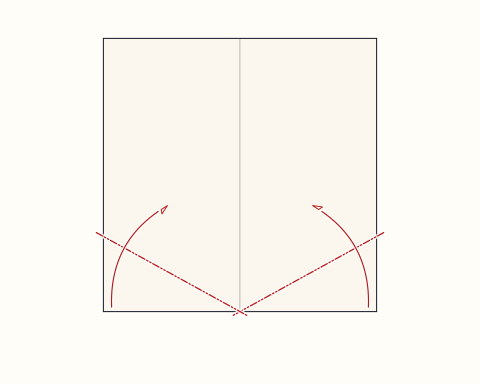
Fold the two bottom corners behind along slanted lines that start about a quarter of the way up each side and meet at the bottom end of the centre crease, so the bottom of the ghost becomes a wide, shallow point.
Step 3
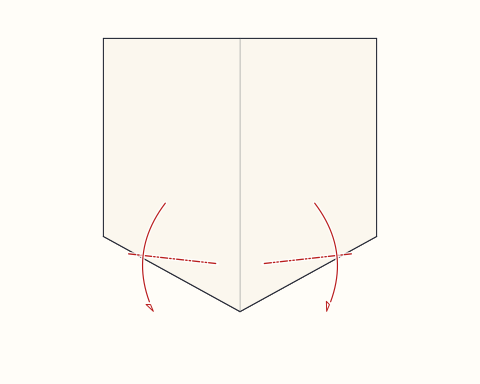
Reach behind and fold each hidden corner back down so its tip pokes out below the slanted edge, pointing straight down and level with the middle point. The ghost now has a wavy hem with three points.
Step 4
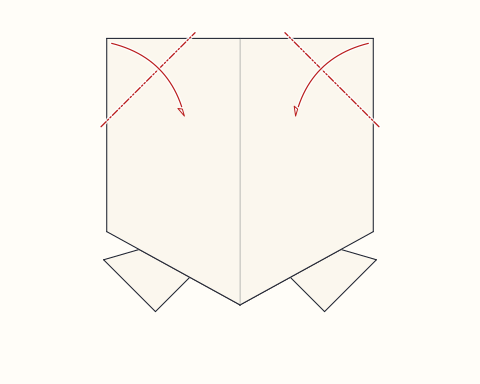
Fold both top corners behind along short diagonal lines, about a third of the way along each edge, to give the head its shape.
Advertisement
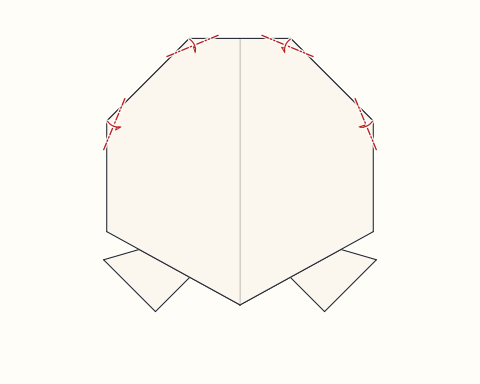
Step 5
Fold the four small corners around the head behind by a tiny amount so the top becomes a smooth, rounded dome.
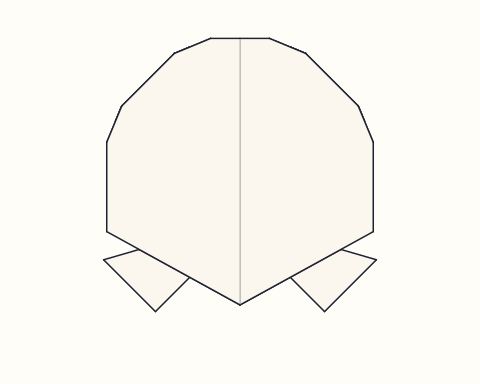
Finished
Your ghost is finished: a round head and a wavy, pointed hem, all in white. Draw two big oval eyes and an open mouth with a black marker, and it is ready to haunt a window, a card or a Halloween garland.
About the origami ghost
This origami ghost is a simple flat design made for Halloween crafts. Instead of hiding the white side of the paper, it puts it on show: the whole ghost is a single white layer on the front, with every fold tucked out of sight behind it. The result is a clean, cartoon-style ghost with a domed head and a wavy hem, the shape most people picture when they think of a friendly sheet ghost. Because the face is drawn on rather than folded, each ghost can look happy, scared, cheeky or spooky.
The sequence is a good introduction to mountain folds, which send paper behind the model instead of towards you. The hem is the interesting part: the two bottom corners go behind to make a shallow point, then each hidden corner is folded back out so its tip peeks below the edge. That small move turns one point into three and gives the ghost its floating, rippling hem. The head is shaped with larger folds first and small ones after, the usual way to suggest a curve in flat origami.
Ghosts are quick enough to fold in bulk for a Halloween party, a classroom activity or a window display. Hang them on thread as a garland, tape them to glass, glue them to cards or use them as place cards and gift tags. For a full Halloween set, fold the Witch Hat from orange, purple or black paper, a black Cat Face, and bats and pumpkins to go alongside.
Origami ghost: questions
Is the origami ghost easy enough for young children?+
Yes. It uses only a centre crease and a few folds behind the model, and every fold starts from a clear point such as a corner, an edge or the centre crease. Children of about six can usually fold it with a little help on the hem points in step 3.
What paper should I use for an origami ghost?+
Any square that is white on one side works, because the finished ghost shows only the white side. Plain white printer paper cut into a square is ideal, and thin paper makes the small rounding folds easier. Glow-in-the-dark or pearly paper gives an extra spooky look.
How do I draw the ghost's face?+
Use a black marker and draw two tall oval eyes in the upper half of the body, with a round or wavy open mouth below them. Leave some white around the face so the ghost still reads clearly from a distance, for example in a window.
Can I make the ghost bigger for a decoration?+
Yes. The folds work the same on any square, so a 25 to 30 cm sheet makes a ghost large enough for a door or wall. Use a slightly heavier paper at that size so the ghost stays flat when you hang it.
What other Halloween origami can I fold with this?+
The witch hat on this site is folded from a kite in six steps and pairs well with the ghost on cards and garlands. The cat face folded from black paper makes a good Halloween cat, and bats and pumpkins complete a spooky set.
Fold this next
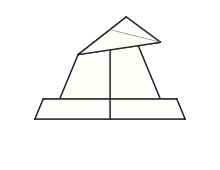
Witch Hat
The origami witch hat is a flat Halloween hat with a tall cone, a crooked tip that droops to one side and a wide brim, folded from one square without cuts or glue. It is an easy model with six steps and takes about four minutes, starting from a simple kite.
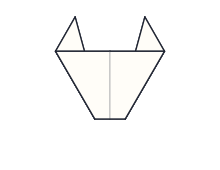
Cat Face
The origami cat face is a kitten's head with two pointed ears and a blunt chin, folded from one square and finished with drawn eyes and whiskers. It is a very easy model with five folds and takes about three minutes, so it suits young children and first-time folders.
Fortune Teller
The origami fortune teller is a four-pointed paper game, also known as a cootie catcher or chatterbox, that opens and closes on your fingers to reveal hidden messages. It is an easy model folded from one square with only corner-to-centre folds and takes about five minutes, plus a few more to write the fortunes.
Paper Hat
The origami paper hat is the classic triangular newspaper hat, often worn as a pirate or admiral's hat, folded from a single rectangle with no tape. It is an easy model that takes about three minutes, and a double sheet of newspaper makes one big enough for a child or an adult to wear.