How to Fold an Origami Skull
The origami skull is a flat Halloween skull with a domed cranium and a narrower jaw that sticks out underneath, folded from one square with the white side showing. It is an easy model with eight steps and takes about five minutes; you draw the eye sockets, nose and teeth on at the end.
Quick answerThe origami skull is an easy model folded in 8 steps and about 5 minutes, using the crease and pleat. You need a 15 cm (6 in) square, white on at least one side; plain white printer paper cut square works well.
- Difficulty
- Easy
- Time
- About 5 min
- Steps
- 8
- Paper
- A 15 cm (6 in) square, white on at least one side; plain white printer paper cut square works well
Printable Skull diagram (PDF)
All 8 steps with pictures on 3 pages, ready to print in color or black and white. Free, no sign-up.
Lay the square with the white side facing up, fold it in half from left to right, and open it again so a vertical crease marks the middle.
Tip: swipe the diagram, or use ← → on your keyboard. Space plays and pauses.
All steps
Step-by-step instructions
The same 8 steps as the animation above, written out so you can fold away from the screen.
Step 1
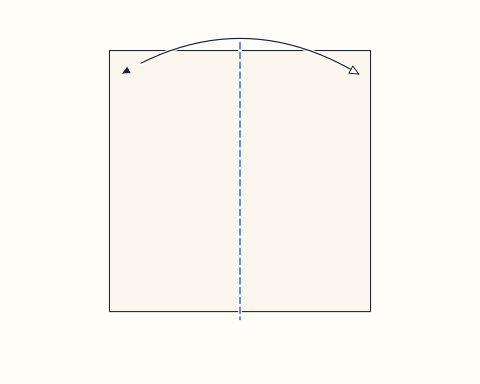
Lay the square with the white side facing up, fold it in half from left to right, and open it again so a vertical crease marks the middle.
Step 2
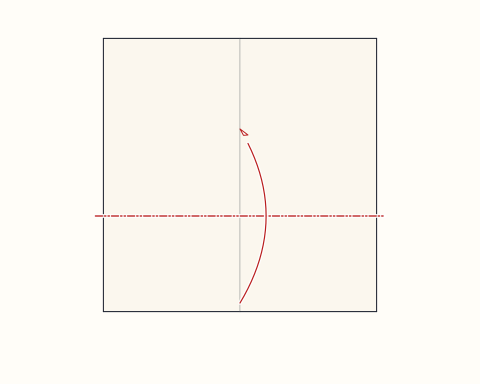
Fold the bottom edge up behind the paper, so a strip about a third of the square's height lies on the back. The new folded edge at the bottom sits a little below the middle of the square.
Step 3
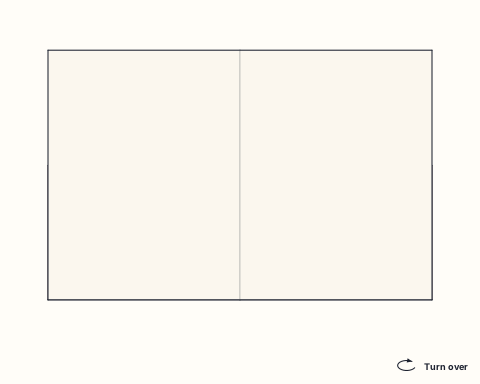
Turn the paper over. The strip you just folded is now on top, with its loose edge running across near the top.
Step 4
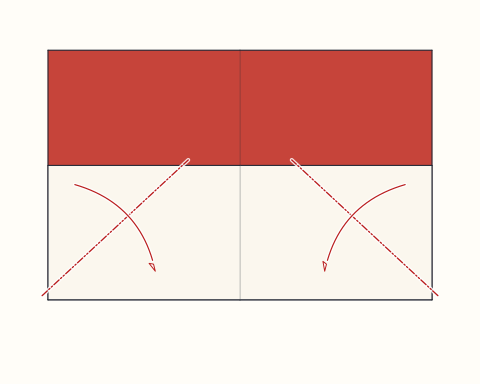
Fold the two top corners of the strip inside, tucking them between the strip and the paper underneath, along slanted lines that run from the loose edge down to the sides. The strip now narrows towards its loose edge: it will be the jaw.
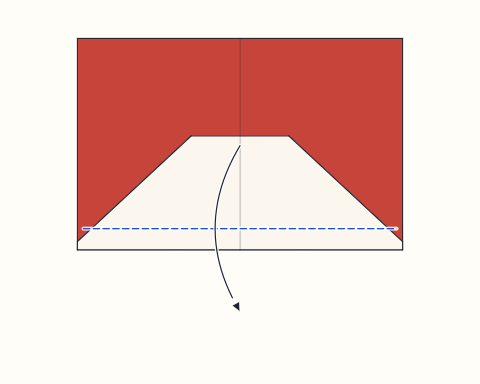
Step 5
Fold the strip back down along a line a little below its middle, so its narrow end sticks out past the bottom edge of the paper.
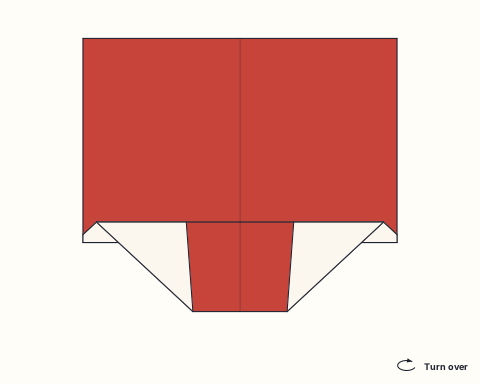
Step 6
Turn the paper over. You can see a square head with the narrower jaw sticking out underneath.
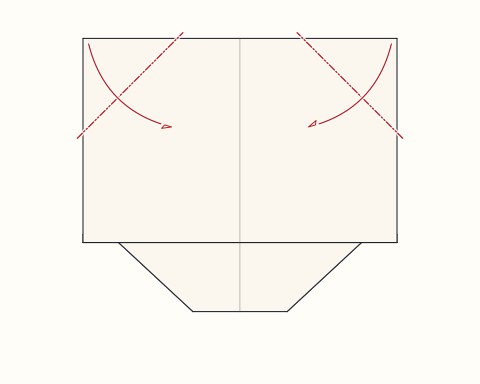
Step 7
Fold the two top corners behind along short diagonal lines, a little over a quarter of the way along each edge, to start rounding the head.
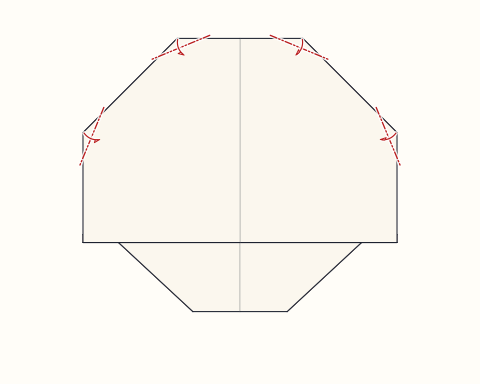
Step 8
Fold the four small corners around the head behind by a tiny amount, so the top of the skull becomes a smooth dome.
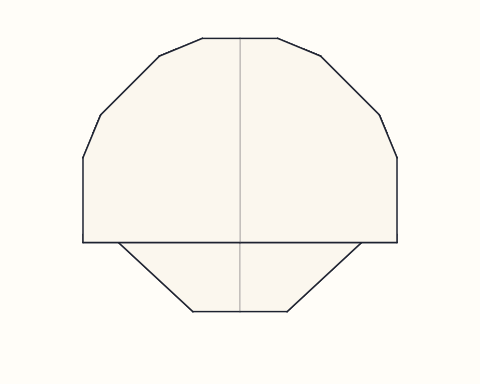
Finished
Your skull is finished: a round cranium with a narrower jaw underneath. Draw two big round eye sockets, an upside-down heart for the nose and a row of teeth across the jaw with a black marker, and it is ready for a window, a garland or a Day of the Dead card.
About the origami skull
This origami skull is a simple flat design made for Halloween crafts. Like the origami ghost, it keeps the white side of the paper on show and hides every fold behind it, so the front is a clean surface for drawing. The difference is the jaw: instead of a hem, the bottom of the square becomes a narrower jaw that sticks out below the head, which turns a rounded shape into a recognisable skull.
The jaw is made with a pleat, one of the most useful moves in origami. The bottom strip folds up behind, its corners are tucked inside, and then it folds back down so only its narrowed end peeks out. Tucking the corners between the layers keeps the jaw white and the back tidy. The head is then shaped the usual way for flat models: two larger folds first, then four small ones to round off the corners.
Skulls are quick to fold in bulk and suit both Halloween and Day of the Dead. Draw each one with a different expression, string them up as a garland, stick them to a window or glue them to cards. They look especially good alongside the Ghost, Bat and Pumpkin on this site.
Halloween
More Halloween origami
Fold a matching set: the skull looks great next to these, and the Halloween page has garland, window and party ideas.
Origami skull: questions
Is the origami skull easy for beginners?+
Yes. It uses a centre crease, a pleat and a few small folds behind the model. The only step that needs a little care is tucking the strip's corners inside in step 4; lift the strip slightly with one hand and fold each corner under it with the other.
What paper is best for an origami skull?+
White paper, because the finished skull shows the white side. Plain printer paper cut into a square is ideal and takes marker well when you draw the face. Thin paper makes the small rounding folds in step 8 easier to keep neat.
How do I draw the skull's face?+
Draw two large round or slightly square eye sockets in the middle of the head and fill them with black marker. Add an upside-down heart or triangle for the nose just above the line where the jaw starts, then draw a row of short vertical lines across the jaw for the teeth.
Can I use the origami skull for Day of the Dead?+
Yes. Fold it from brightly colored paper, or from white paper and decorate it in the style of a sugar skull with flowers around the eyes, dots and swirls. A string of colorful paper skulls makes a cheerful Día de los Muertos garland.
What other Halloween origami goes with the skull?+
The ghost on this site is folded in a similar way and makes a good pair with the skull on a window. Add a black origami bat, an orange pumpkin and a witch hat for a complete Halloween set.
Fold this next
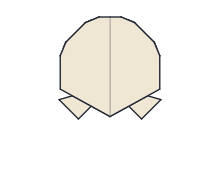
Ghost
The origami ghost is a flat Halloween ghost with a round, domed head and a wavy hem of three points, folded from one square with the white side showing. It is an easy model with five steps and takes about three minutes; you draw the eyes and mouth on at the end.
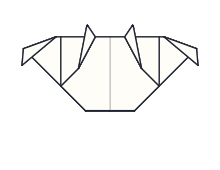
Bat
The origami bat is a flat Halloween bat with wide wings, hooked wing tips, a short body and two pointed ears, folded from one square without cuts or glue. It starts from the waterbomb base and takes about six minutes; every fold after the base is a simple valley or mountain fold.
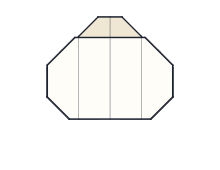
Pumpkin
The origami pumpkin is a flat, rounded jack-o'-lantern with a short stem on top and three creased ribs down the front, folded from one square without cutting. It is an easy model of seven steps that takes about five minutes, and the face is drawn on at the end.
Witch Hat
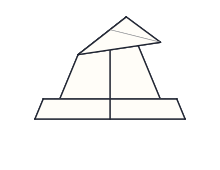
The origami witch hat is a flat Halloween hat with a tall cone, a crooked tip that droops to one side and a wide brim, folded from one square without cuts or glue. It is an easy model with six steps and takes about four minutes, starting from a simple kite.