How to Fold an Origami Bat
The origami bat is a flat Halloween bat with wide wings, hooked wing tips, a short body and two pointed ears, folded from one square without cuts or glue. It starts from the waterbomb base and takes about six minutes; every fold after the base is a simple valley or mountain fold.
Quick answerThe origami bat is an easy model folded in 9 steps and about 6 minutes, using the crease and waterbomb base. You need a 15 cm (6 in) square, black on one side; any dark color works.
- Difficulty
- Easy
- Time
- About 6 min
- Steps
- 9
- Paper
- A 15 cm (6 in) square, black on one side; any dark color works
Printable Bat diagram (PDF)
All 9 steps with pictures on 3 pages, ready to print in color or black and white. Free, no sign-up.
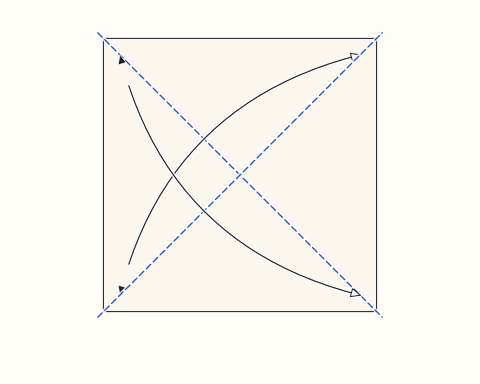
Lay the square with the white side facing up. Fold it in half corner to corner, open it, then fold along the other diagonal and open it again, so an X is creased into the paper.
Tip: swipe the diagram, or use ← → on your keyboard. Space plays and pauses.
All steps
Step-by-step instructions
The same 9 steps as the animation above, written out so you can fold away from the screen.
Step 1
Lay the square with the white side facing up. Fold it in half corner to corner, open it, then fold along the other diagonal and open it again, so an X is creased into the paper.
Step 2
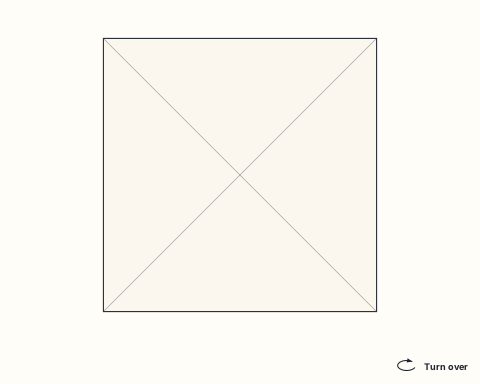
Turn the paper over so the colored side faces up.
Step 3
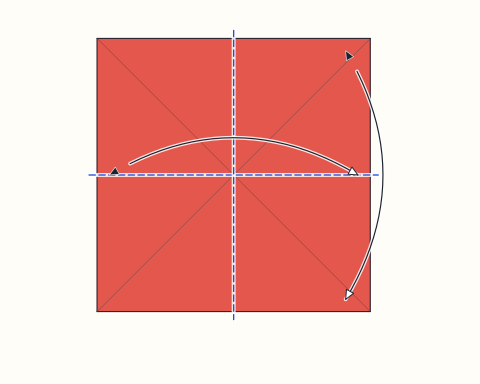
Fold the square in half edge to edge, open it, then fold it in half the other way and open it again. You now have a cross of creases on top of the X.
Step 4
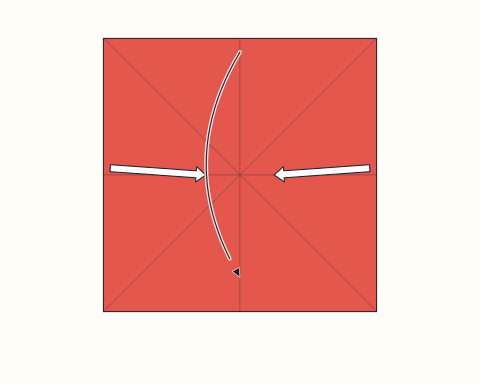
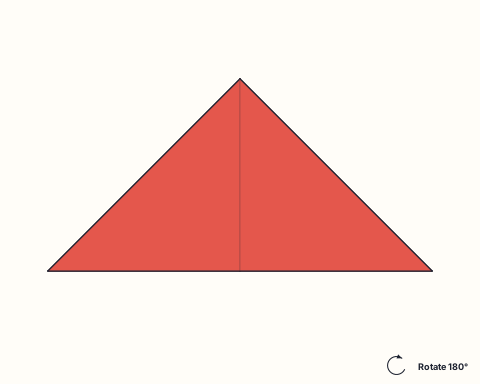
Hold the paper by the left and right edges, push them in towards the middle along the creases and bring the top half down over them, so the square collapses flat into a triangle with two flaps on each side. This is the waterbomb base.
Step 5
Turn the triangle upside down so the long folded edge runs along the top and the point is at the bottom.
Step 6
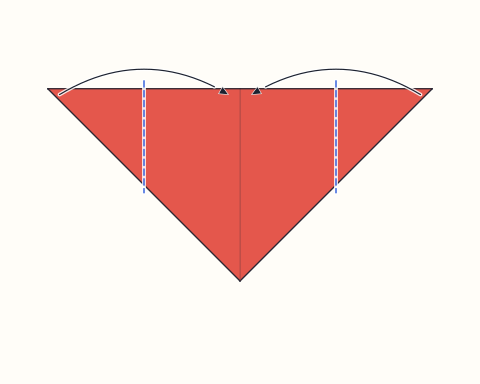
Take only the two front flaps and fold their outer top corners in to meet at the middle of the top edge. Each fold line runs straight down, halfway between the side corner and the middle. The back flaps stay where they are: they become the wings.
Step 7
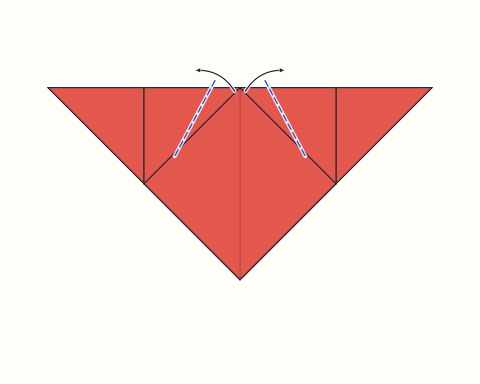
Fold the tip of each of those corners up and outward along a slanted line that starts on the top edge a little way from the middle. The tips now stick up above the top edge as two pointed ears.
Step 8
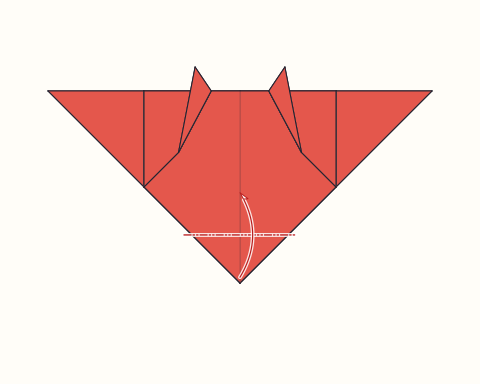
Fold the bottom point behind the model, through all the layers, about a quarter of the way up. The bat now has a short body with a flat bottom.
Step 9
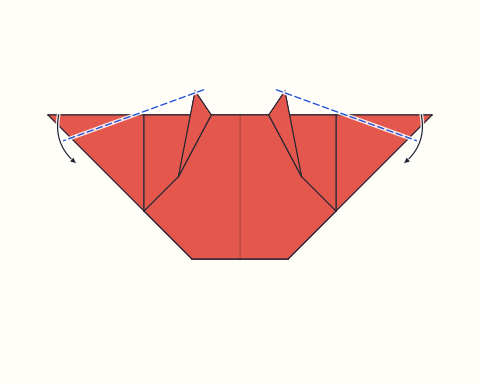
Fold each wing tip down in front along a slanted line that runs from the top edge, just outside the ears, to the lower edge of the wing. The point flicks out below the wing like the hooked claw at the end of a bat's wing.
Finished
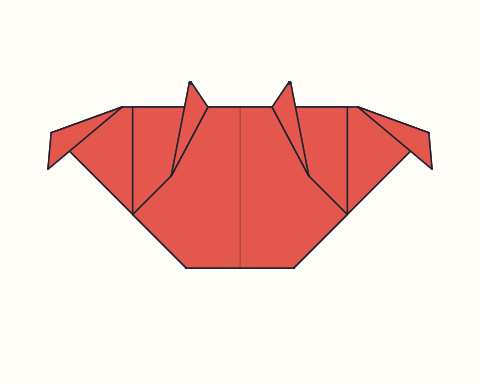
Your bat is finished: wide wings with hooked tips, a short body and two pointed ears. Give it two white or yellow eyes with a gel pen or small stickers, then hang it upside down from a thread or tape it to a window.
About the origami bat
This origami bat is a flat design made for Halloween decorations. It begins with the waterbomb base, one of the oldest bases in paper folding, and turns it upside down so the long folded edge becomes the top of the wings. The two back flaps of the base stay untouched as the wings, while the two front flaps are folded into the middle and their tips flipped up to make the ears. Because the paper is two layers thick everywhere you can see, the bat shows only its colored side and stays crisp and flat.
The sequence is a good next step after the very simplest models. It introduces a collapse — bringing several creases together at once to form a base — and then uses only straightforward valley and mountain folds. The ear fold in step 7 is the clever part: a small slanted fold turns each corner tip around so it pokes up above the edge. The last two steps shape the silhouette, blunting the body and flicking out the wing tips to suggest the claws at the end of a bat's wing.
Bats are the easiest way to make a Halloween room feel spooky. Fold them in black paper and hang them from thread so they twist in the air, stick a swarm of them flying up a wall, or glue one to the front of a party invitation. For a matching set, fold white ghosts, orange pumpkins and a black witch hat to go with them.
Halloween
More Halloween origami
Fold a matching set: the bat looks great next to these, and the Halloween page has garland, window and party ideas.
Origami bat: questions
Is the origami bat easy enough for kids?+
Yes, for children of about seven and up. The only move that needs care is collapsing the waterbomb base in step 4; an adult can help with that, and every fold after it is a simple fold along an edge or a corner. Younger children can decorate the finished bats.
What paper should I use for an origami bat?+
A 15 cm (6 in) square that is black on one side is ideal, because the finished bat shows only the colored side. Dark purple, grey or brown also look good. Thin origami paper makes the small ear folds easier; you can also print black or bat-patterned squares on ordinary printer paper.
What is a waterbomb base?+
It is one of the basic starting shapes in origami: a square creased along both diagonals on one side and both midlines on the other, then collapsed into a triangle with two flaps in front and two behind. The same base is used for the origami water balloon, and the bat simply folds it in a different way.
How do I make the bat hang upside down?+
Push a needle and thread through the body just below the ears, tie a loop and hang the bat from it with the ears pointing down. A small piece of tape on the back of the body works too if you are hanging bats from a shelf edge or a window frame.
Can I make a bat garland?+
Yes. Fold 10 to 15 bats, then thread them on baker's twine through the body or fix each one with a small piece of tape, about 10 cm (4 in) apart. Alternate them with white origami ghosts and orange pumpkins for a classic Halloween garland.
Fold this next
Ghost
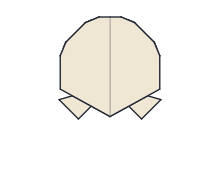
The origami ghost is a flat Halloween ghost with a round, domed head and a wavy hem of three points, folded from one square with the white side showing. It is an easy model with five steps and takes about three minutes; you draw the eyes and mouth on at the end.
Pumpkin
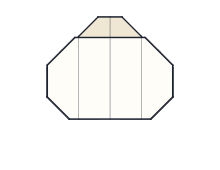
The origami pumpkin is a flat, rounded jack-o'-lantern with a short stem on top and three creased ribs down the front, folded from one square without cutting. It is an easy model of seven steps that takes about five minutes, and the face is drawn on at the end.
Skull
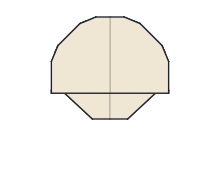
The origami skull is a flat Halloween skull with a domed cranium and a narrower jaw that sticks out underneath, folded from one square with the white side showing. It is an easy model with eight steps and takes about five minutes; you draw the eye sockets, nose and teeth on at the end.
Witch Hat
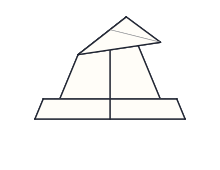
The origami witch hat is a flat Halloween hat with a tall cone, a crooked tip that droops to one side and a wide brim, folded from one square without cuts or glue. It is an easy model with six steps and takes about four minutes, starting from a simple kite.