How to Fold an Origami Pumpkin
The origami pumpkin is a flat, rounded jack-o'-lantern with a short stem on top and three creased ribs down the front, folded from one square without cutting. It is an easy model of seven steps that takes about five minutes, and the face is drawn on at the end.
Quick answerThe origami pumpkin is an easy model folded in 7 steps and about 5 minutes, using the crease. You need a 15 cm (6 in) square, orange on one side and white or green on the other.
- Difficulty
- Easy
- Time
- About 5 min
- Steps
- 7
- Paper
- A 15 cm (6 in) square, orange on one side and white or green on the other
Lay the square as a diamond with the orange side facing you. Fold it in half from the left corner to the right corner, then open it again so a vertical crease runs down the middle.
Tip: swipe the diagram, or use ← → on your keyboard. Space plays and pauses.
All steps
Advertisement
Step-by-step instructions
The same 7 steps as the animation above, written out so you can fold away from the screen.
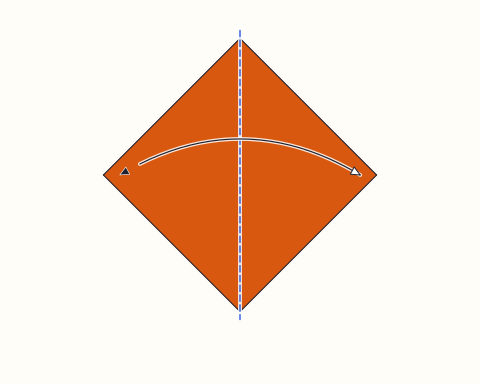
Step 1
Lay the square as a diamond with the orange side facing you. Fold it in half from the left corner to the right corner, then open it again so a vertical crease runs down the middle.
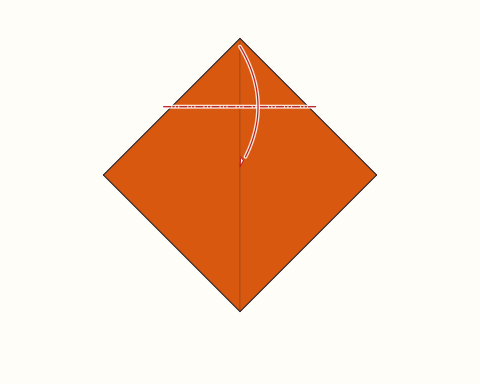
Step 2
Fold the top corner behind the paper so its tip lands exactly on the centre of the square. The top of the shape is now a flat edge.
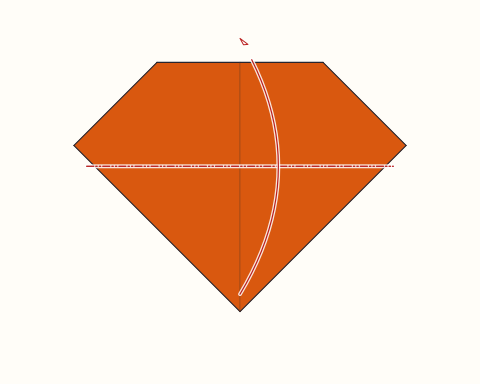
Step 3
Fold the bottom corner up behind the paper, past the flat top edge, until its tip sticks out above the top by about 2 cm (3/4 in). This little white point will be the stem.
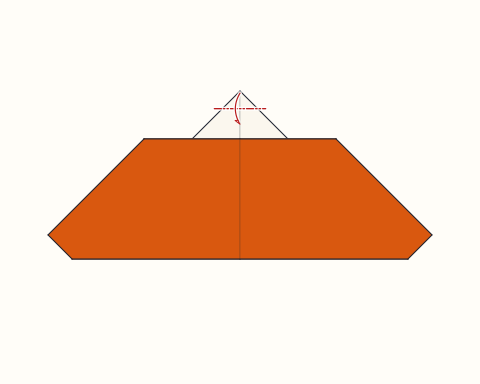
Step 4
Fold the very tip of the stem down behind, so the stem has a flat top instead of a sharp point.
Advertisement
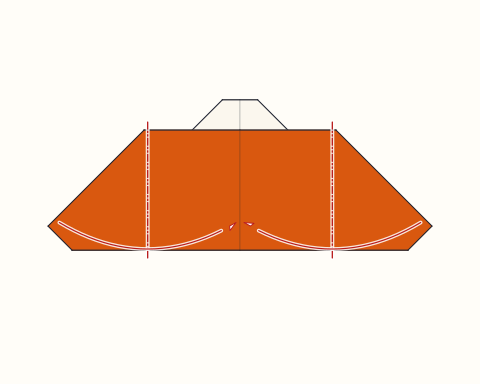
Step 5
Fold the left and right corners behind along upright lines, the same distance from the centre crease on both sides. The front is now a wide orange rectangle with the stem on top.
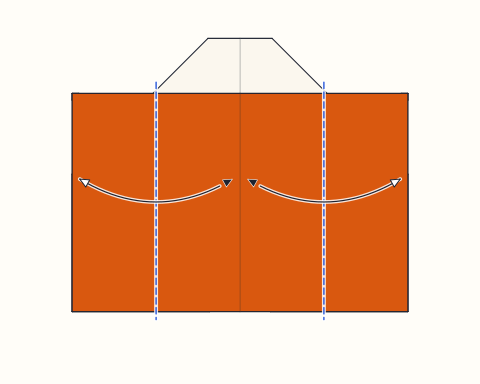
Step 6
Fold the left edge to the centre crease and unfold, then do the same with the right edge. With the middle crease you now have three ribs running down the pumpkin.
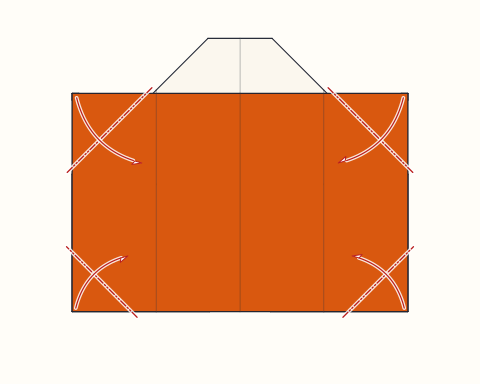
Step 7
Fold all four corners of the rectangle behind to round off the shape, making the two top corners slightly bigger than the two bottom ones.
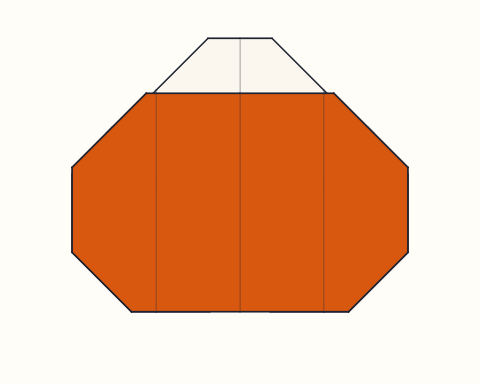
Finished
Your pumpkin is finished. Draw a jack-o'-lantern face on the smooth orange front with a black marker, such as triangle eyes, a triangle nose and a jagged grin, and colour the white stem green or brown if you like.
About the origami pumpkin
The flat pumpkin is a simple seasonal model built from the same ideas as many beginner folds: corners folded to a centre point, a corner turned into a small feature, and edges folded behind to shape the outline. Its charm comes from the finish rather than the folding. The front stays one smooth orange panel, which makes it an ideal surface for drawing, and every pumpkin in a group can end up with a different face, from friendly to spooky.
Folding it teaches a useful habit: working from the back. All of the shaping happens behind the paper with mountain folds, so the model looks finished from the front at every stage. The stem shows how a single corner can be pushed past an edge to become a separate feature that shows the other side of the paper, and the rib creases show how a few plain fold lines can suggest shape on a flat surface.
Paper pumpkins make easy Halloween and autumn decorations for windows, garlands, cards, name tags and party tables. Fold them in several sizes for a pumpkin patch on a wall, or back them with card to stand them up. For more seasonal folding, try the Cat Face in black paper, fill a Masu Box with sweets, or fold a Water Balloon and draw a face on it for a round, three-dimensional pumpkin.
Origami pumpkin: questions
Is the origami pumpkin easy enough for kids?+
Yes. It uses only mountain folds and two simple creases, with clear landmarks such as the centre of the square and the middle crease. Most children from about six can fold it with a little help on the stem step, and drawing the face is the fun part at the end.
What paper should I use for an origami pumpkin?+
A 15 cm (6 in) square of orange origami paper is ideal. The front of the pumpkin shows the coloured side and the stem shows the back, so paper with a white or green back works best. Printer paper coloured with orange pencil or paint also works, as long as it is cut to a square.
How do I make the stem longer or shorter?+
The stem is the bottom corner poking up above the top edge. Push the corner further past the edge in step 3 for a taller stem, or less for a short stub. A taller stem makes the pumpkin body a little shorter, because the same corner is used for both.
Can I make the pumpkin rounder?+
Yes. After step 7, fold the new small corners behind as well, taking off just a sliver each time. The more corners you soften, the closer the outline gets to a smooth circle.
What else can I fold for a Halloween table?+
Pumpkins pair well with a cat face folded from black paper, a paper hat for a simple witch look, and a masu box for sweets. Together they make a quick set of decorations from a handful of squares.
Fold this next
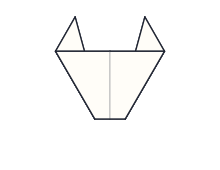
Cat Face
The origami cat face is a kitten's head with two pointed ears and a blunt chin, folded from one square and finished with drawn eyes and whiskers. It is a very easy model with five folds and takes about three minutes, so it suits young children and first-time folders.
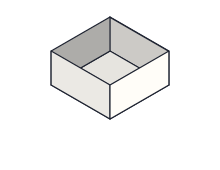
Masu Box
The masu box is a traditional Japanese square box folded from a single sheet that locks together without glue. It is an intermediate model that takes about eight minutes, with one three-dimensional step where the walls are raised.
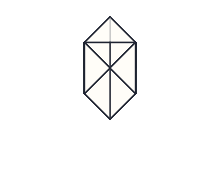
Water Balloon
The origami water balloon, also called the waterbomb, is a traditional model that you fold flat and then inflate by blowing into a small hole, turning it into a hollow paper cube. It is a beginner-to-intermediate model that takes about eight minutes, mostly for the waterbomb base and the tucks.
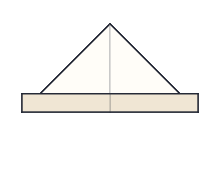
Paper Hat
The origami paper hat is the classic triangular newspaper hat, often worn as a pirate or admiral's hat, folded from a single rectangle with no tape. It is an easy model that takes about three minutes, and a double sheet of newspaper makes one big enough for a child or an adult to wear.