Quick answer
To make a square from a rectangle, fold one short edge down along a long edge to form a triangle, crease the line where the triangle ends, and cut or tear off the strip below it. An A4 sheet (21 × 29.7 cm) gives a 21 cm square; a US Letter sheet (8.5 × 11 in) gives an 8.5 in square.
Why origami needs a square
A square has four equal sides and four right angles, so it is perfectly symmetrical along both diagonals and both midlines. Traditional bases such as the preliminary base, the waterbomb base and the blintz fold rely on that symmetry: corners must meet corners and edges must meet edges exactly. If your “square” is a few millimeters off, the error grows with every fold, and by the end the points of a crane or the walls of a box no longer line up.
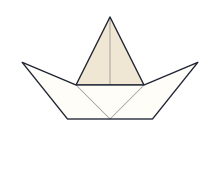
A few models, such as the Paper Boat and the Jumping Frog, are designed for rectangles. For everything else, a careful square is the single biggest improvement you can make to your folding.
The fold-and-cut method, step by step
This is the method most folders learn first. It needs nothing but the sheet, a flat table and, optionally, scissors or a ruler.
- 1Lay the rectangle on a hard, flat surface in portrait orientation (short edge at the top).
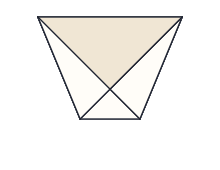
- 2Take the top-left corner and fold it down and to the right until the short top edge lies exactly along the right-hand long edge. You now have a right-angled triangle on top of a rectangular strip.
- 3Check the alignment: the top edge and the right edge should be flush along their whole length, and the fold should run cleanly into the top-right corner. Adjust before creasing.
- 4Hold the paper in place and crease the diagonal firmly, working from the corner outward.
- 5Fold the uncovered strip at the bottom up over the edge of the triangle and crease hard along that line. This line is where you will separate the square.
- 6Unfold the strip and cut along the crease with scissors, or use one of the no-scissors methods below.
- 7Open the triangle. You have a square with one diagonal crease already in it, which many models use anyway.
TipIf the corner at the bottom of the diagonal looks slightly off, trust the edges rather than the corner. Aligning the full length of two edges is always more accurate than aiming for a point.
Advertisement
Square sizes from common paper
The side of the square always equals the short side of the rectangle. The strip you remove is the long side minus the short side. Here are the numbers for the sheets you are most likely to have.
| Sheet | Sheet size | Square | Leftover strip |
|---|---|---|---|
| A4 | 21 × 29.7 cm | 21 × 21 cm | 21 × 8.7 cm |
| US Letter | 8.5 × 11 in | 8.5 × 8.5 in | 8.5 × 2.5 in |
| A5 | 14.8 × 21 cm | 14.8 × 14.8 cm | 14.8 × 6.2 cm |
| A3 | 29.7 × 42 cm | 29.7 × 29.7 cm | 29.7 × 12.3 cm |
| US Legal | 8.5 × 14 in | 8.5 × 8.5 in | 8.5 × 5.5 in |
| Tabloid / Ledger | 11 × 17 in | 11 × 11 in | 11 × 6 in |
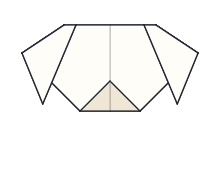
An A4 or Letter square is a little larger than standard 15 cm (6 in) origami paper, which is no bad thing: bigger paper is easier for beginners and children. Printer paper is thicker than origami paper, though, so it suits simple models like the Paper Cup, Dog Face and Samurai Helmet better than a many-layered crane.
Making a square without scissors
Scissors are not essential, which is handy in classrooms with young children. Two reliable options:
- Fold and tear. After step 5 above, fold the strip back and forth along the crease three or four times, pressing hard each time. The fibers weaken, and you can tear the strip off slowly while holding the paper flat on the table with your other hand.
- Lick-and-tear (for thin paper). Run a slightly damp fingertip along the crease, then tear gently. This gives a surprisingly clean edge on thin paper, but avoid it on printer paper you plan to fold immediately, because damp paper creases poorly.
A torn edge is slightly fuzzy, which rarely matters for simple models. For precise models, a ruler and craft knife on a cutting mat, or a paper trimmer, gives the cleanest result.
Getting smaller or specific sizes
Once you have one square, you can divide it into smaller squares by folding it in half both ways and cutting along the creases. Each cut halves the side length:
- A 21 cm A4 square gives four 10.5 cm squares, or sixteen 5.25 cm squares.
- An 8.5 in Letter square gives four 4.25 in squares.
- Four quarter squares from one A4 sheet are ideal for practicing small models such as the Tulip and Fox Face.
If you need an exact size, such as 15 cm, measure 15 cm along the top and side edges from one corner, mark both points lightly, and cut from mark to mark with a ruler. Or skip the measuring entirely: our printable origami paper tool prints true-to-scale squares from 7.5 to 25 cm with cut lines on A4, Letter or A3, in plain colors or patterns.
Advertisement
Don’t throw away the strip
The strip left over from A4 or Letter paper is useful. Trim it lengthwise into strips about 1.5 cm (1/2 in) wide and you have the perfect material for a Lucky Star, which is folded from a long narrow strip rather than a square. A wider leftover from A3 or Tabloid paper can be squared again to make a second, smaller square.
Common mistakes and how to avoid them
- Folding in the air. Always fold on a table. Holding the sheet up makes it impossible to align edges accurately.
- Aligning corners instead of edges. Line up the whole top edge with the whole side edge, not just the corner points.
- Cutting beside the crease. Cut exactly on the crease line; if you cut a millimeter inside, the sheet is no longer square.
- Using curled paper. Paper straight from a printer or a roll can be curled. Flatten it under a book first.
- Checking only once. After cutting, fold the square along the other diagonal. If the corners meet exactly, it is square; if not, trim the long side slightly.
What to fold with your first square
A freshly cut A4 or Letter square is perfect for a first model. The Paper Cup takes two minutes and uses only valley folds; the Dog Face and Fox Face are just as quick. If you have never read a fold diagram before, the guide to origami symbols explains the dashed lines and arrows, and origami for beginners suggests a sensible order for your first ten models.