Quick answer
In origami diagrams, a dashed line is a valley fold (fold toward you) and a dash-dot line is a mountain fold (fold away). A curved arrow shows where paper moves, an arrow that returns means fold and unfold, a looped arrow means turn the model over, a hollow arrow means push or sink, and tick marks on an arrow mean repeat the step.
Lines: where to fold
| Line | Meaning | What to do |
|---|---|---|
| Dashed line (– – –) | Valley fold | Fold the paper toward you so the crease sinks like a valley. |
| Dash-dot line (– · – ·) | Mountain fold | Fold the paper away from you, behind the model, so the crease rises like a ridge. |
| Thin solid line | Existing crease | A crease you made earlier; usually a guide for a later fold. |
| Thick solid line | Edge of the paper | The outline of the paper or model as it is now. |
| Dotted line | Hidden edge (X-ray view) | An edge or flap behind other layers, shown so you can locate it. |
Diagrams almost always show the paper from the side facing you, so valley and mountain folds are defined relative to your view. A mountain fold is really just a valley fold made from the other side. If folding behind feels awkward, turn the model over, make a valley fold, and turn it back.
TipMany diagrams color the two sides of the paper differently (for example, colored and white). Before each step, check which color should be facing you.
Arrows: what moves and where
Arrows carry the action. Their shape tells you the kind of movement:
- Fold in front (valley arrow). A curved arrow with a solid, filled head. The paper at the tail travels over the top and lands where the head points.
- Fold behind (mountain arrow). A curved arrow with a hollow, half-open head, often drawn as if disappearing behind the paper. The flap goes behind the model.
- Fold and unfold. An arrow that travels out and comes back, with a head at each end or a return loop. Make the fold, crease it firmly, then open it again. The result is a crease used as a guide later.
- Unfold or pull out. A hollow arrow pointing away from a flap, meaning open or pull out a layer that is currently hidden.
- Push, sink or squash. A short, fat, hollow arrow pointing into the paper. It appears in squash folds, inside reverse folds and sink folds, where paper is pushed inward rather than simply folded over.
Advertisement
Moving the whole model
Some symbols do not fold anything; they tell you to reposition the paper. Missing one is the most common reason a following step looks impossible.
| Symbol | Meaning |
|---|---|
| Looped arrow (a loop with an arrowhead) | Turn over: flip the model like a page, left to right, so the back faces you. |
| Circle of two curved arrows, often with 90° or 180° | Rotate: turn the model flat on the table by the angle shown, without flipping it. |
| Eye symbol with an arrow | View from here: the next picture shows the model from the direction indicated. |
| Circle or magnifier around a detail | Enlarged view: the next pictures zoom in on a small area. |
After any turn-over or rotation, compare your model with the next picture carefully. The same corners, edges and flaps should be in the same places.
Repeat marks and measurement marks
- Repeat. An arrow whose tail is crossed by short strokes means repeat the step; each stroke usually stands for one repetition. Some diagrams simply write “repeat on the other side” or “×2”.
- Repeat behind. A repeat arrow drawn going behind the model means do the same fold on the back.
- Equal distances. Matching tick marks on two segments mean the lengths are equal.
- Equal angles. Matching arcs in two corners mean the angles are equal, for example when a corner is bisected.
- Fold to a point. A small circle or dot marks a point to fold to or through, such as the center of the paper.
How common moves are drawn
Named moves are built from the symbols above. Once you recognize the combinations, a diagram becomes much faster to read.
| Move | How it usually appears |
|---|---|
| Pleat | A valley line and a mountain line side by side, with an arrow showing the zigzag. |
| Squash fold | A fold line on a flap plus a push arrow into its pocket. |
| Inside reverse fold | A mountain line across a point with a push arrow; the point goes inside itself. |
| Outside reverse fold | Valley and mountain lines on either side of a point, with arrows wrapping around the outside. |
| Rabbit ear | Two valley lines meeting at a point and a short mountain line, with the flap swung to one side. |
| Petal fold | Pre-creased side lines and a valley line across the top, with a long arrow lifting the bottom corner. |
| Sink fold | A mountain line across a closed point and a hollow push arrow. |
A reading strategy that works
- 1Look at the whole step picture and the next one before folding. The next picture is the answer.
- 2Match orientation: is your paper the same way up, with the same side facing you?
- 3Find the line type, then follow the arrow from tail to head.
- 4Check for repeat marks, so you do not forget the second side.
- 5Fold, then compare with the next picture. If it does not match, unfold and try again.
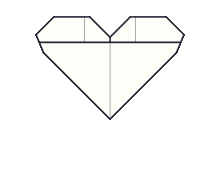
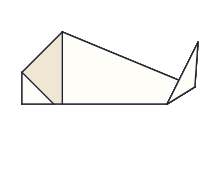
On this site you have an extra helper: every diagram animates, so a symbol you are unsure of can be watched in motion. Try it on the Heart, which uses valley folds, mountain folds and turn-overs, or the Fish, a five-step model with a mountain fold in the middle. For a one-page visual summary, see how to read origami diagrams, and for definitions of every fold and base, browse the glossary.