Quick answer
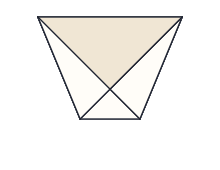
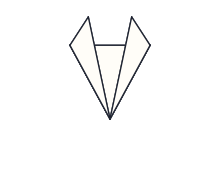
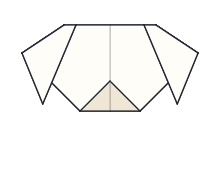
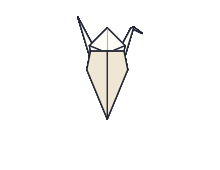
Start origami with a 15–25 cm square of thin paper, a flat table and very easy models such as the paper cup, tulip and dog face, which use only valley and mountain folds. Crease firmly, align edges before pressing, and move on to the masu box, butterfly and finally the paper crane as each model begins to feel easy.
What you need
- Square paper. Standard origami paper (kami) is ideal, but a square cut from printer paper works for every model in the first half of the list below. See how to make square paper.
- A hard, flat surface. A table, not your lap. Folding on a surface is the single best habit you can build.
- Clean, dry hands. Paper picks up moisture and dirt quickly.
- Optional: a bone folder or the back of a spoon for sharper creases, and a marker for drawing faces on animals.
Choose a larger square than you think you need. A 20–25 cm (8–10 in) sheet makes every fold bigger and every mistake smaller. You can shrink down later. Our guide to paper types and sizes explains the options.
The only two folds you need to start
Nearly every origami move is built from two basic folds:
- The valley fold: the paper folds toward you, making a V-shaped valley. In diagrams it is a dashed line.
- The mountain fold: the paper folds away from you, making a ridge. In diagrams it is a dash-dot line.
A mountain fold is just a valley fold seen from the other side, so if a mountain fold feels awkward you can turn the paper over, make a valley fold and turn it back. You will also meet the crease, a fold that you make and then open again to leave a guide line.
Advertisement
How to read an origami diagram
Diagrams are a visual language shared by folders around the world. Each picture shows the paper before a fold, with lines to show where to fold and arrows to show what moves. Read each step in this order:
- 1Look at the shape and orientation of the paper in the picture and match your paper to it.
- 2Find the fold line (dashed for valley, dash-dot for mountain).
- 3Follow the arrow to see which part moves and where it lands.
- 4Glance at the next picture to see the result before you fold.
A looping arrow means turn the paper over. For the full list of marks, read the origami symbols guide or the shorter how to read origami diagrams. On this site every diagram also animates, so you can watch the move and replay it as often as you like.
Seven tips for neat creases
- 1Align first, crease second. Line up edges and corners, hold them with one finger, then press.
- 2Crease from the middle outward. Press the center of the fold first, then run your nail toward each end. This stops the paper shifting.
- 3Press hard. Weak creases are the root of most later problems. Go over important creases twice.
- 4Align edges, not points. Matching a whole edge is more accurate than aiming one corner at another.
- 5Check the next picture. If your paper does not match, undo the last fold and try again. Paper forgives a lot.
- 6Keep it symmetrical. Fold one side, then do the mirror fold on the other side straight away while the alignment is fresh.
- 7Stop when frustrated. Take a break. Coming back with fresh eyes almost always makes a stuck step obvious.
Your first ten models, in order
This order starts with models that use only valley folds, then adds mountain folds, a first three-dimensional step, a base collapse and finally the classic crane. Each links to an animated diagram with written steps and a printable PDF.
| # | Model | Time | What it teaches |
|---|---|---|---|
| 1 | Paper Cup | 2 min | Valley folds, tucking a flap into a pocket |
| 2 | Tulip | 3 min | Folding from a diamond, symmetry |
| 3 | Fox Face | 3 min | Precise corner-to-corner folds |
| 4 | Dog Face | 3 min | First mountain folds |
| 5 | Fish | 4 min | Folding edges to a center line |
| 6 | Samurai Helmet | 4 min | Layered flaps and a clean brim |
| 7 | Heart | 5 min | Small shaping folds behind the model |
| 8 | Paper Boat | 5 min | Opening a model and flattening it into a new shape |
| 9 | Masu Box | 8 min | Blintz fold and raising 3D walls |
| 10 | Butterfly | 6 min | Collapsing a waterbomb base |
After these ten, you are ready for the Paper Crane. It introduces the preliminary base, the petal fold and the inside reverse fold, all at once. Expect your first crane to take fifteen minutes and to look a little rumpled; the second will be much better.
TipFold each model two or three times before moving on. The second fold is where the sequence clicks, and the third is where it starts to look good.
Advertisement
Common beginner mistakes
- Starting too hard. The crane is famous, but it is an advanced model. Build up to it.
- Paper too small. Tiny paper hides errors until it is too late to fix them.
- Skipping pre-creases. When a step says fold and unfold, those creases are guides for a later step. Skipping them makes collapses almost impossible.
- Wrong side up. Many first steps specify colored or white side up. Starting on the wrong side can leave the finished model inside out.
- Rushing turn-overs. After turning the paper over, compare it with the next picture before folding again.
Keep going
Once the first ten feel comfortable, browse the intermediate models, try action models like the Jumping Frog and Pinwheel, or fold a few easy gifts for friends. And if you are folding with children, our origami for kids guide has age-by-age suggestions.